i am a mediocre vim user. sure, i've been using vim for over twenty years, have handcrafted a custom vimrc, and even written a syntax file, but for my day-to-day usage, my skills are resoundingly and undeniably mediocre.
this is a good place to be. people who are 'power users' spend so much time fiddling with plugins and configurations to build their perfect homerolled ide that they never get any real work done. vim becomes their personality, not their tool. by contrast, novices don't have the skill or knowledge to leverage vim's power. they thrash around, treating vim like a cumbersome and difficult nano; they google how to quit. that's not good for productivity!
the sweet spot is in the middle: mediocrity.
this post is going to go over five vim features that will get you on the path from novice to mediocre.

nobody cares if you're mediocre at vim
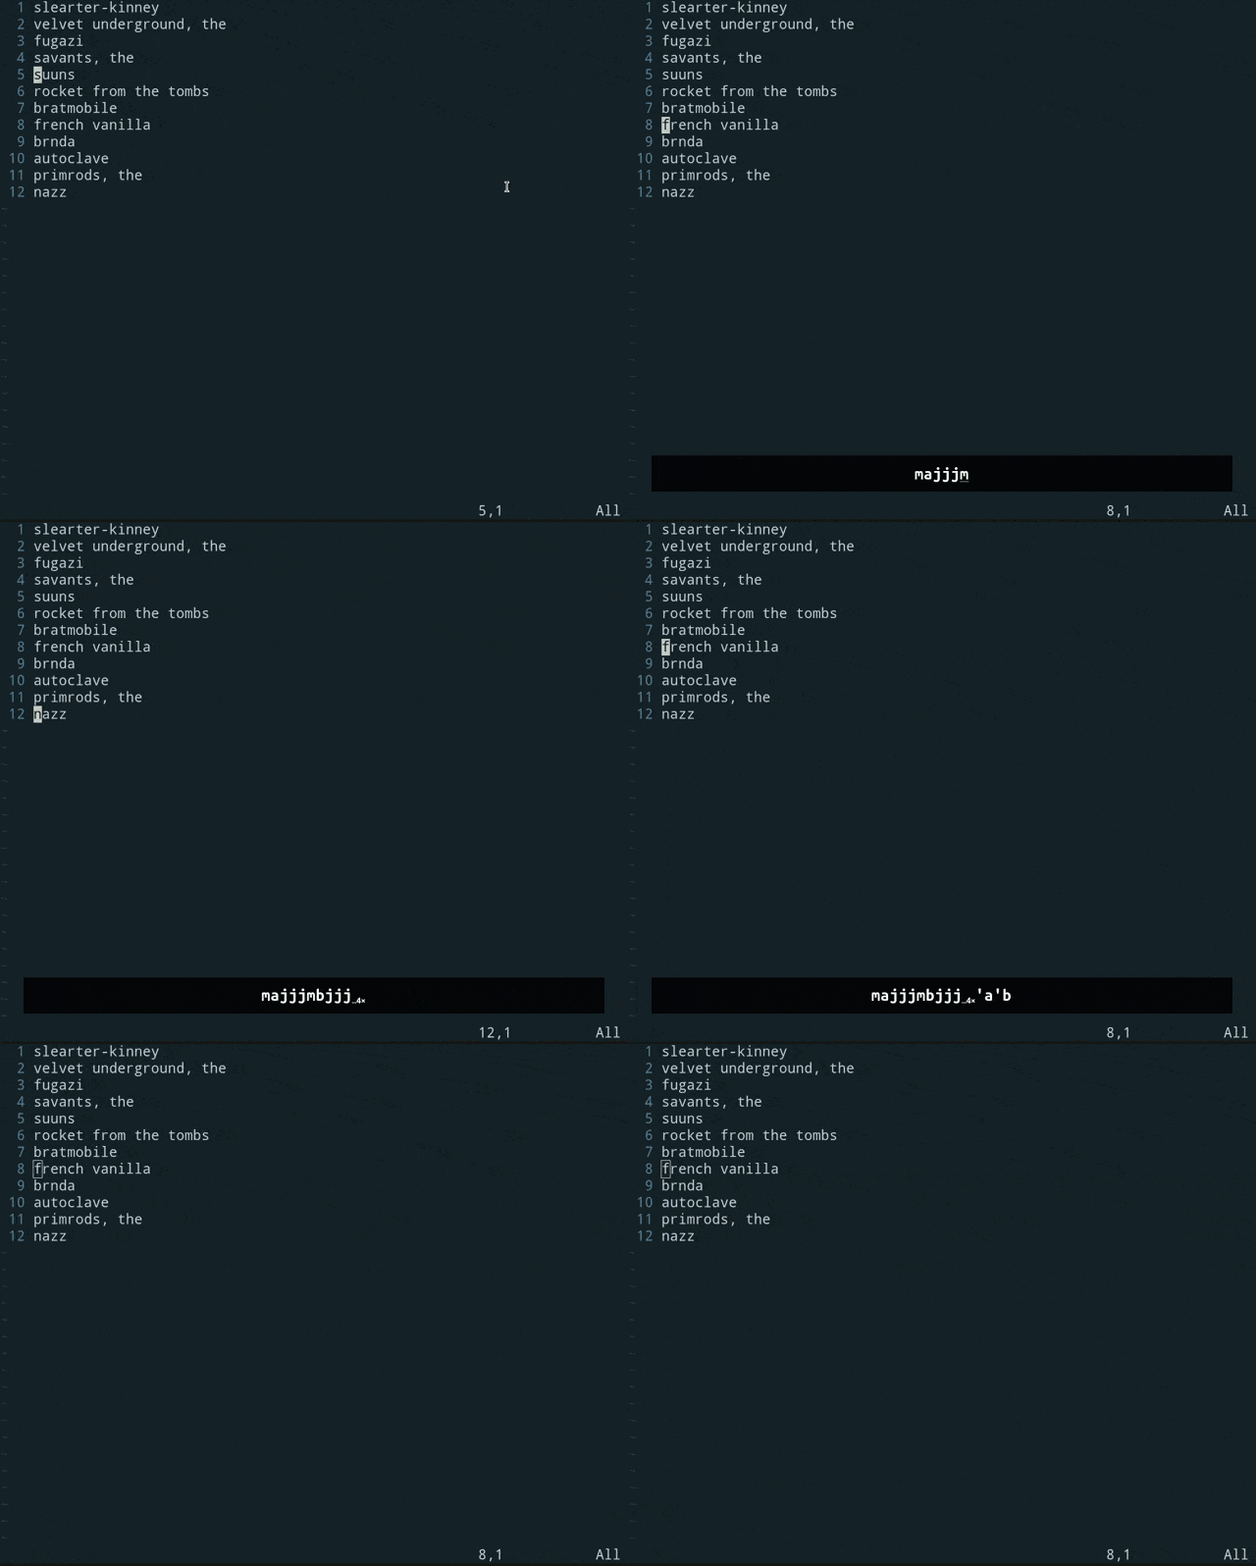
doing bookmarks with m and '
vim allows you to set a bookmark on a given line and jump back to that line at any time. this is a useful feature if you don't want to be like my former co-worker wes who used to keep a scratchpad of Important Line Numbers beside his keyboard.
bookmarks are set by using m plus a one-letter identifier in command mode. so, for instance, to set a bookmark labelled 'a', we would do
<ESC>ma
since bookmarks have a one-letter label, we can have a whole bunch of them. we can have an 'a' bookmark and a 'b' one and so on, until we run out of alphabet.
to jump back to our bookmark, in command mode, we use ' (the single quote) plus the identifier of the bookmark we want to jump to. so, ie.
<ESC>'a
would bring us back to bookmark 'a'.

dangerous 'power user' territory for bookmarks
if we want to venture outside the comfortable zone of mediocrity, bookmarks have plenty of other features we can obsess over. we can jump to not just the line, but the column of our bookmark using the backtick instead of the single quote. we can list and manage our bookmarks with :marks. we can delete them with :delm. lots of stuff, which is all covered on the vim fandom page on bookmarks.
doing shell escapes with !!
we can dump the output of any shell command straight into our vim buffer by using a 'shell escape'.
shell escapes are called by typing !! in command mode, followed by the shell command we want to run. for example, if we wanted to insert the current date as output by bash's date command, we would:
<ESC>!!date
or, if we wanted to dump the contents of another file into the file we're editing, we could use cat like so:
<ESC>!!cat /path/to/file
even better, when we shell escape with !!, the content of the current line is used as input for our shell command. so, if we wanted to, say, replace all the letter 'e's in the current line with the number 3, we could use tr like so:
<ESC>!!tr 'e' '3'
this would take the contents of the current line and pipe it into our tr command. the output of tr would then overwrite our line in vim.

doing better shell escapes with !}
the !! shell escape is great, but it only works on the current line. truly mediocre vim users can use !} to pipe an entire paragraph into a shell escape.
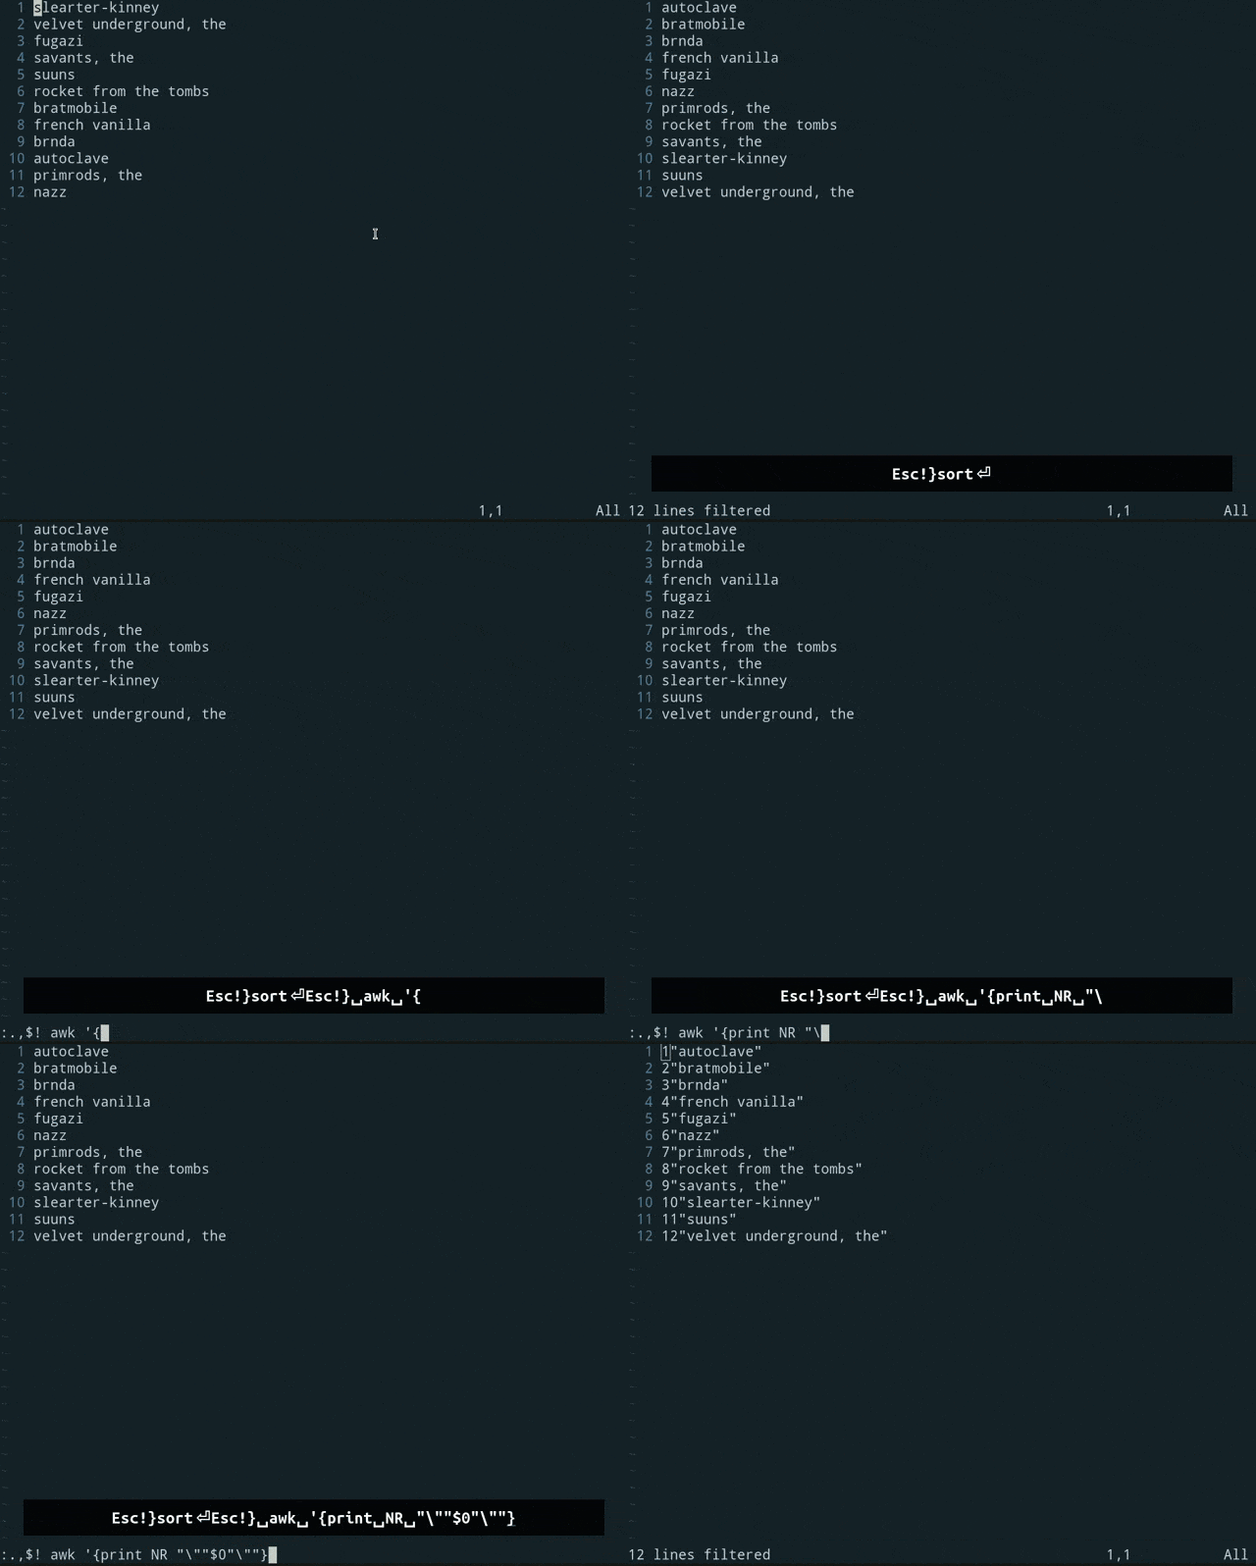
for example, if we have a paragraph in vim that is a list of rock bands, we can sort that entire list alphabetically by moving our cursor to the first line of the paragraph and applying bash's sort command like so:
<ESC>!}sort
the entire paragraph is sent as input to sort, and sort's output replaces the entire paragraph.
if we have a decent understanding of shell tools like awk and sed, this can allow us to do extremely mediocre things. for instance, if we want to take that entire list of bands and enclose each line in quotes and number them, we could do:
!}!awk '{print NR". \""$0"\""}'

dangerous 'power user' territory for shell escaping
there's lots of shell escaping power outside the comforting boundaries of mediocrity, and we can go there if we feel brave. there's stuff like using :call system() or suppressing output with :silent!! and other rabbit holes we can venture down instead of getting stuff done. there's a fair overview of these in this post on executing shell commands in vim.
doing autocomplete with ^p and ^n
autocompletion is a handy tool. we all use very descriptive and, consequently, very long names for variables and functions like good programmers, but the punishment for that is all the typing and the risk of errors. autocompletion takes that pain away.
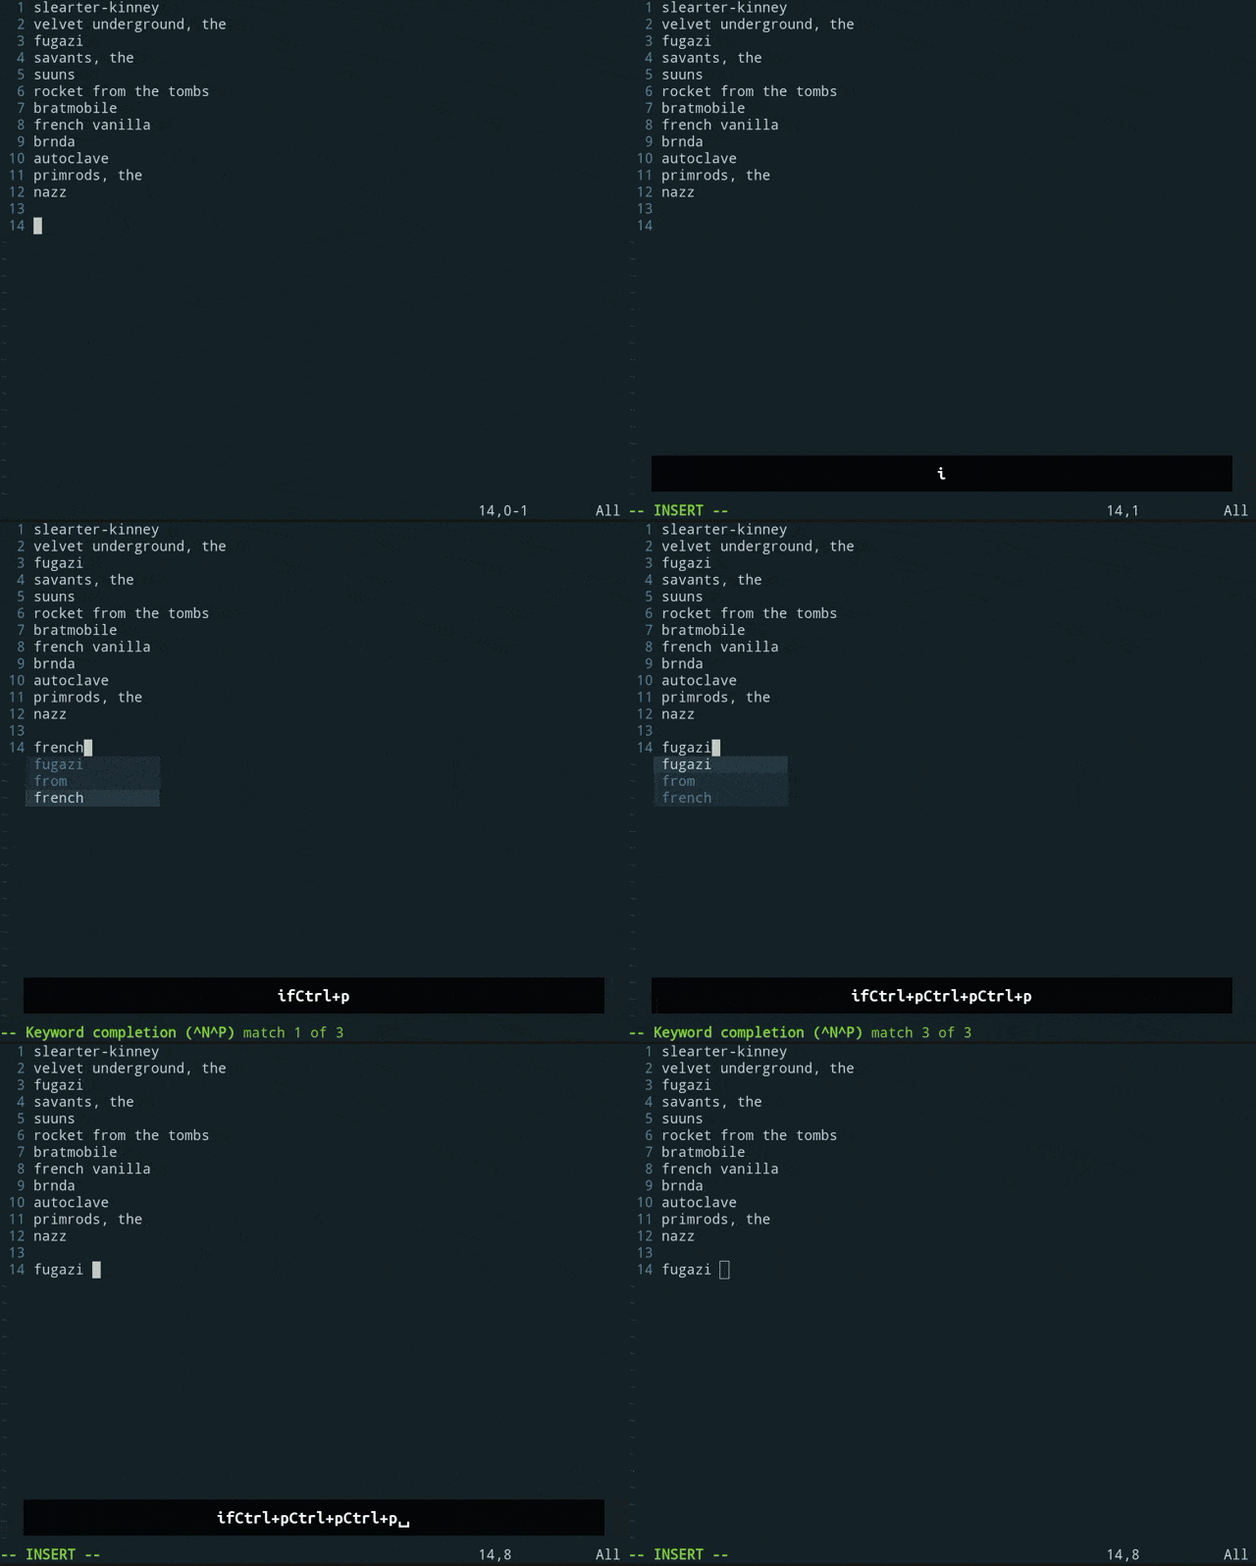
vim allows us to do autocompletion with ^p (that's the control key and 'p' as a 'chord') and ^n in insert mode.
using ^p will search the file we're editing from the current line up until it finds the first word that matches the text we've typed. the 'p' stands for 'previous', as 'up the file'. if we like that suggestion, we can hit <SPACE> and accept it. if we don't like it, we can just hit ^p again (and again and again) until we find what we're looking for. if our search gets to the top of the file, vim wraps around and starts searching from the bottom.
the ^n combination works the exact same as ^p except is searches down file. the 'n' stands for 'next'.

a note on the dangers of ^p and ^n
if we're using a vim keybinding emulator in another program like an ide, ^p probably won't work. instead of doing something useful like autocompletion, ^p will probably be bound to a little-used feature called 'print', which is a way to make a copy of your file onto a piece of paper so you can recycle it. likewise, ^n will probably create for you a 'new' file, as if editing the current file wasn't already enough.
doing block indentation with visual mode
vim does a pretty good job of autoindenting, but there are times when we make a mess of our file and need to add some manual spaces to keep things neat and tidy.
vim allows us to indent entire blocks by selecting one or more lines in the visual mode and then applying > to indent or < to unindent.
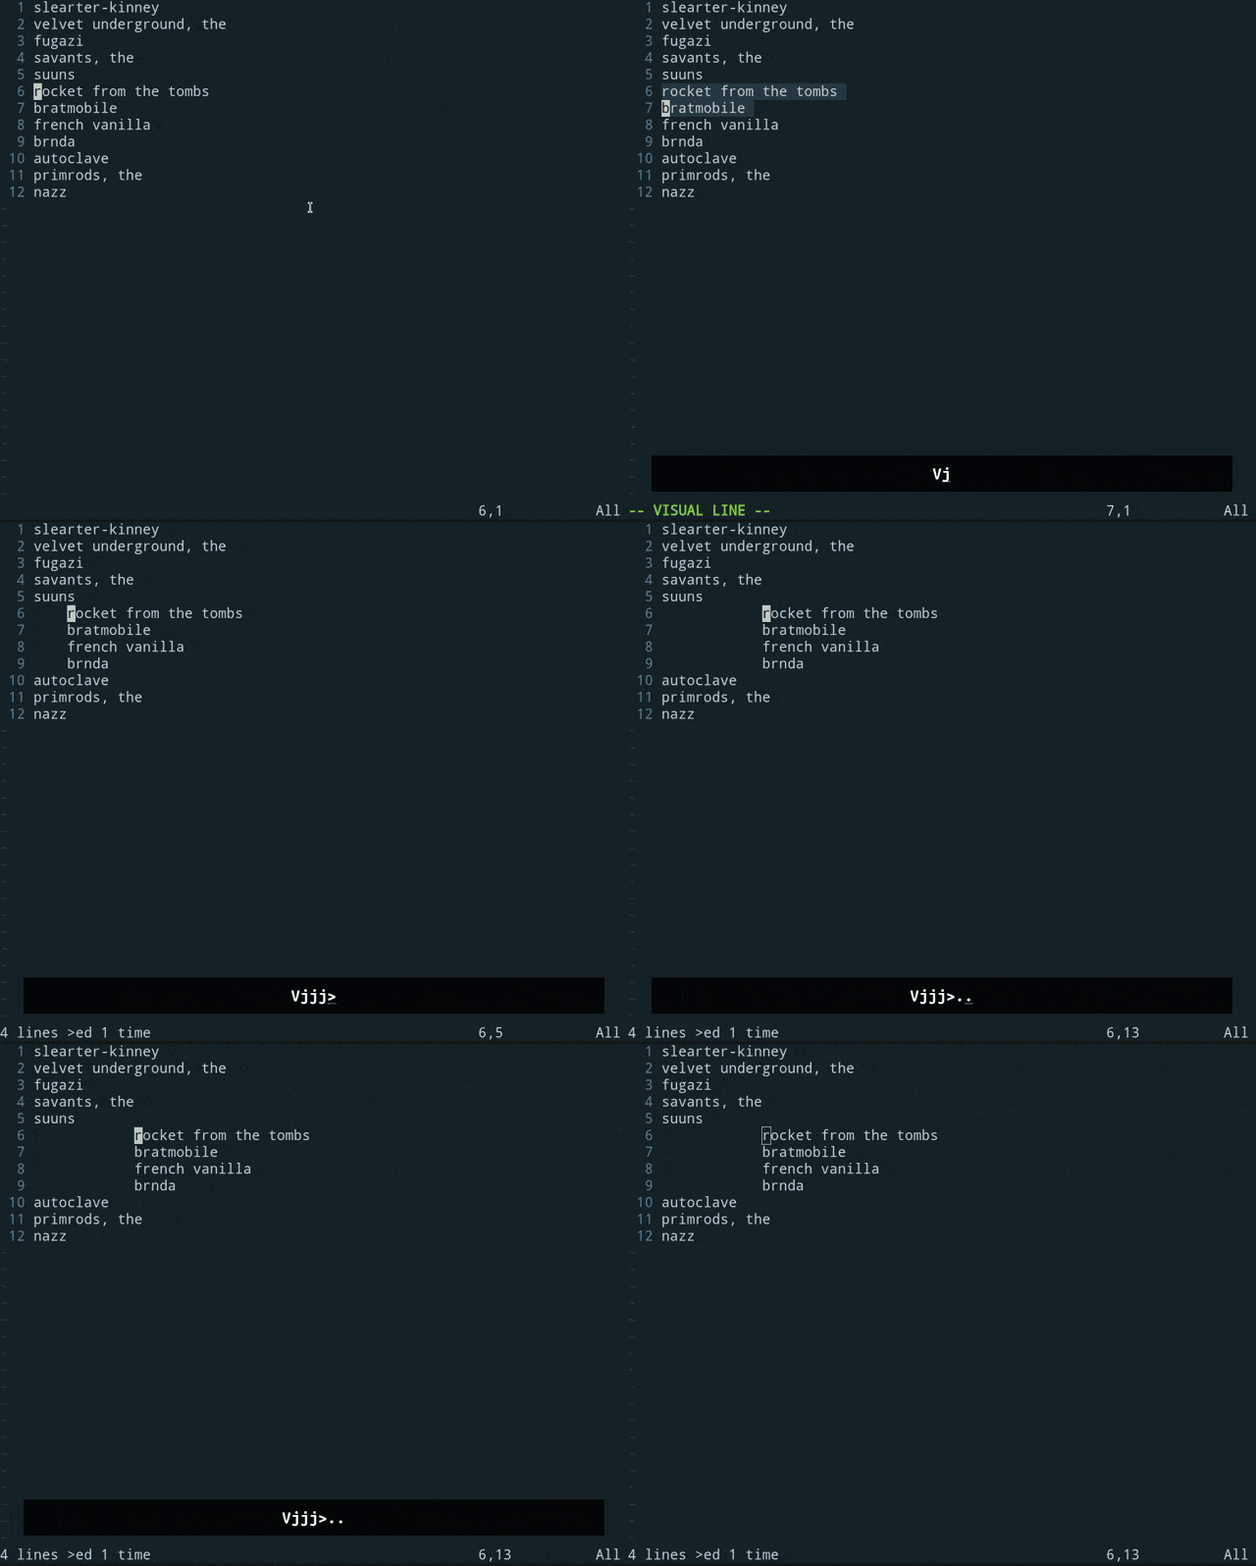
doing this is a two-step process: the selecting-lines-in-visual-mode step, and the indenting-the-selected-lines step. let's look at an example of how we would indent one block of four lines one tab stop:
<ESC><SHIFT>vjjj>
let's pick this apart.
to select our block of four lines, we first enter command mode with <ESC>. standard stuff. from there, we enter visual mode with <SHIFT>v. this highlights our current line. that line is our block. we then use j to move our cursor down three lines. this adds those lines to our block. we now have four lines highlighted.
we then hit the > key. this moves the entire block of highlighted lines one tabstop to the right. indentation achieved.
if we want to indent that block another tabstop, we can then type . (a period). the period key tells vim to redo the previous command. we can hammer on that period as much as we want to keep indenting until our block is where we want it.
to unindent, all we have to do is hit < after selecting our block.

dangerous 'power user' territory for visual blocks
it's easy to get carried away with visual blocks; we can do a lot of stuff. in addition to using it for a block of lines, there's a character mode and a mode that allows us to create a block in the middle of a file. we can also use selected blocks as input for other vim commands with the output going back into that block. this even includes shell escapes. the 'linux handbook' has a good overview of visual mode for people who want to flirt with being a power user.
conclusion
vim has a reputation for being difficult. some of that reputation is earned, to be sure, especially in this modern point-and-click world, but a lot of it has been fostered by power users looking to show off and novices loudly expressing their frustration at the entry barrier.
but vim doesn't need to be difficult. we don't need to be those power users with forty plugins and a five hundred-line .vimrc. we can edit text effectively and quickly in vim with only a limited -- mediocre -- skillset.
🔎 this post originally appeared in the grant horwood technical blog
